
For many beginners recipe for making apple wine is one of the easiest ways to start making homemade fruit wine. Apple wine is a fermented beverage made from apples or apple juice. During fermentation yeast converts natural sugars into alcohol and creates a smooth drink with a fresh fruit flavor.
Many people searching for recipe for making apple wine want a simple method that works at home without complex equipment. The good news is that apple wine is very beginner friendly. Apples contain natural sugar and acidity which makes them ideal for fermentation. With the right steps and clean preparation anyone can produce a balanced homemade wine.
Apple wine is often compared to hard cider but there are important differences. Cider usually keeps more carbonation and fresh apple sweetness. Apple wine is fermented longer and aged which produces a clearer drink with a smoother finish and slightly higher alcohol content.
The flavor of apple wine depends on the type of apples used. Sweet apples can produce a softer wine while tart apples create a brighter and more refreshing taste. Many home winemakers mix apple varieties to create a balanced flavor.
Another reason apple wine is popular is the accessibility of ingredients. Apples and apple juice are widely available in the United States throughout the year. This makes apple wine one of the most practical fruit wines to produce at home.
Homemade apple wine also allows complete control over sweetness and flavor. Some people prefer a dry wine while others enjoy a slightly sweet style. The fermentation process can be adjusted to match personal taste.Mediterranean Spinach and Feta Crisps: Easy And Irresistibly Crispy
When properly fermented and stored apple wine develops a clean aroma and a crisp fruit profile. It pairs well with many foods such as roasted chicken light cheeses and baked desserts.
Ingredients Needed for Apple Wine
Making apple wine at home requires only a few simple ingredients. Each ingredient plays an important role in fermentation, flavor balance, and alcohol production. Using clean and high quality ingredients helps ensure the wine ferments properly and develops a pleasant taste.
Below is a common ingredient list used by many home winemakers in the United States.
Table 1: Basic Ingredients for Apple Wine
| Ingredient | Amount | Purpose |
|---|---|---|
| Fresh apple juice or crushed apples | 1 gallon | Main flavor and natural sugar source |
| Granulated sugar | 2 to 3 cups | Increases alcohol content |
| Wine yeast | 1 packet | Starts fermentation |
| Yeast nutrient | 1 teaspoon | Helps yeast stay active |
| Lemon juice | 2 tablespoons | Adds acidity and balance |
| Campden tablet optional | 1 tablet | Helps control unwanted bacteria |
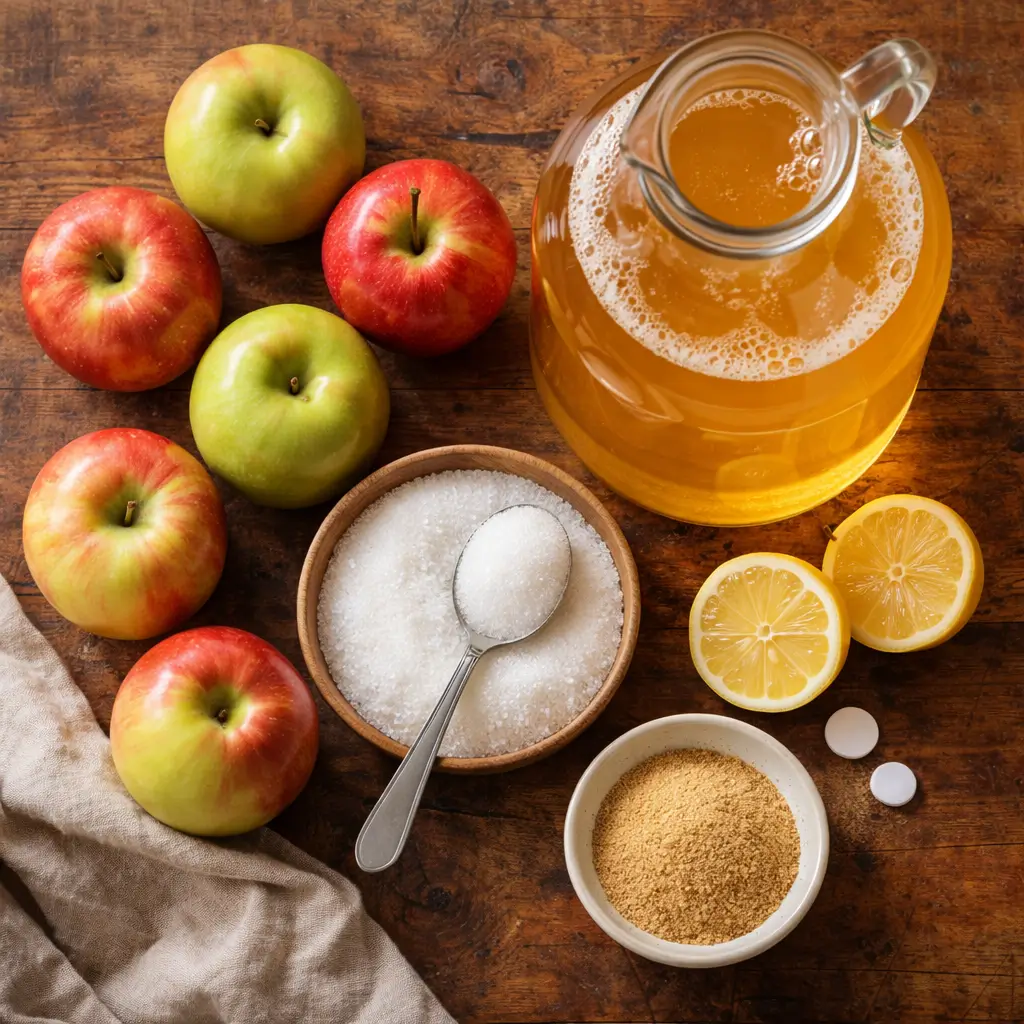
Apple juice is the base of the wine. It can be fresh pressed juice or store bought juice that contains no preservatives. Preservatives can stop yeast activity and prevent fermentation.
Sugar is added because apples alone may not contain enough natural sugar to produce a balanced wine. The added sugar allows yeast to create the desired alcohol level.
Wine yeast is a key ingredient. It converts sugar into alcohol and carbon dioxide. Specific wine yeast strains often produce cleaner fermentation and better flavor compared with bread yeast.
Yeast nutrient provides minerals that help yeast remain healthy during fermentation. This improves fermentation stability and reduces the chance of off flavors.
Lemon juice helps balance the acidity of the wine. Proper acidity improves taste and helps preserve the finished wine.
Some winemakers also use a Campden tablet before fermentation. It helps remove unwanted microorganisms from the juice and allows the wine yeast to ferment more consistently.
Using simple ingredients makes apple wine an ideal project for beginners.
Essential Equipment for Making Apple Wine at Home
Before starting the recipe for making apple wine, it is important to prepare the right equipment. Proper tools make the fermentation process easier and help produce clean and stable wine. Many beginners are surprised to learn that most equipment used in a recipe for making apple wine is simple and affordable.
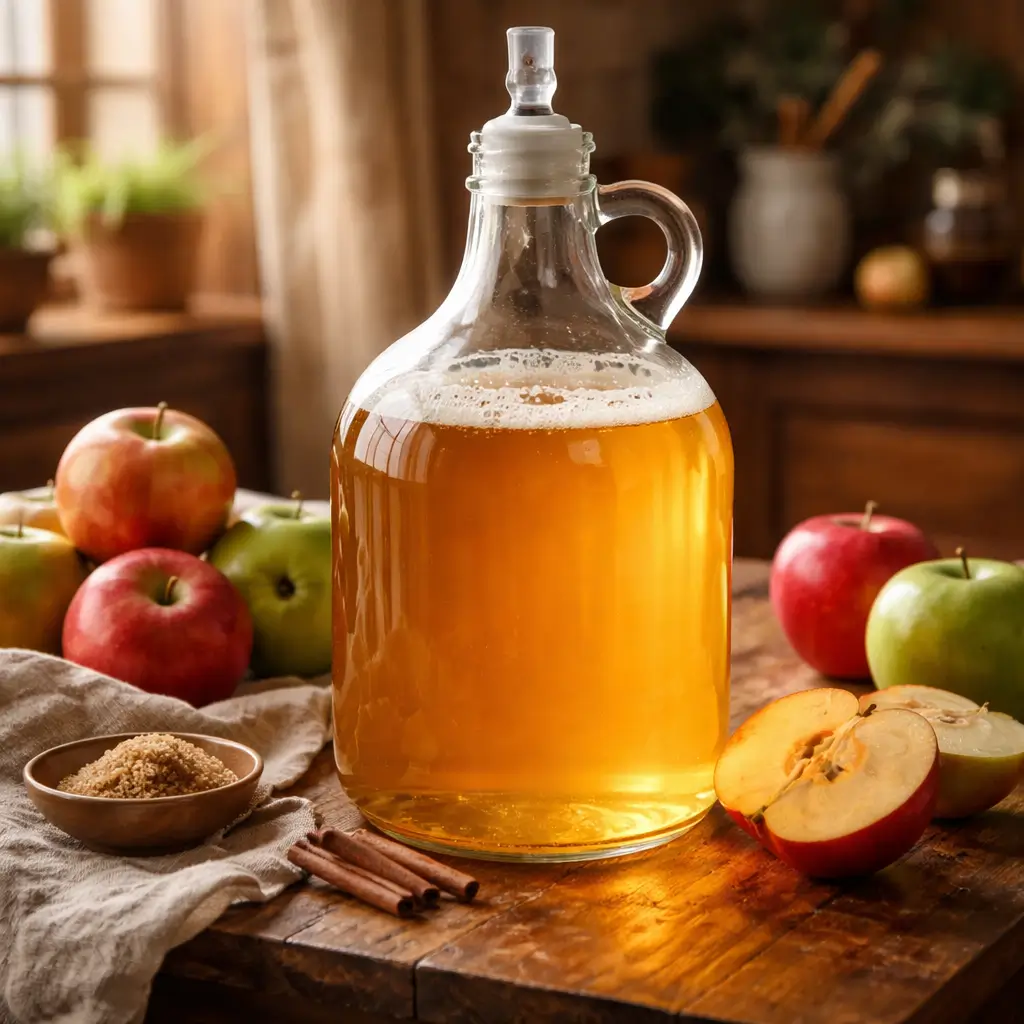
The most important tool in any recipe for making apple wine is a fermentation container. This container holds the apple juice mixture while yeast converts sugar into alcohol. A glass fermentation jug or food grade plastic fermenter works well because it keeps the liquid protected during fermentation.
Another essential piece of equipment for a successful recipe for making apple wine is an airlock. The airlock allows carbon dioxide produced during fermentation to escape while preventing air and contaminants from entering the container. This helps keep the wine safe from spoilage.
A large pot is also useful when preparing the mixture in a recipe for making apple wine. The pot allows you to dissolve sugar and combine ingredients before transferring them into the fermenter.
Cleanliness is extremely important when following a recipe for making apple wine. For this reason many home winemakers use a sanitizing solution to clean all equipment before use. Sanitizing reduces the chance of unwanted bacteria affecting fermentation.
Table 2: Basic Equipment for Apple Wine Fermentation
| Equipment | Purpose |
|---|---|
| Glass fermentation jug | Holds the wine during fermentation |
| Airlock and stopper | Allows gas to escape while blocking air |
| Large pot | Used for mixing ingredients |
| Funnel | Helps transfer liquid into the fermenter |
| Sanitizing solution | Keeps equipment clean |
| Long spoon | Used for stirring ingredients |
A funnel helps transfer the prepared mixture into the fermentation jug without spilling. A long spoon is helpful for mixing ingredients evenly during the preparation stage of the recipe for making apple wine.
These tools allow fermentation to happen in a controlled environment. When everything is clean and properly prepared the yeast can work efficiently and create a balanced wine.
Preparing the Apple Juice Mixture
Preparing the base mixture is one of the most important stages in the recipe for making apple wine. A clean and balanced mixture helps fermentation begin smoothly and improves the final flavor of the wine.
When starting the recipe for making apple wine you can use fresh apples or preservative free apple juice. Many beginners prefer apple juice because it saves time and produces consistent results. If using whole apples they should be washed carefully and crushed to release the juice.
For a standard batch in the recipe for making apple wine begin with about one gallon of apple juice. Pour the juice into a large clean pot. Add the measured sugar and gently stir until the sugar dissolves completely. This step ensures the yeast will have enough sugar to ferment and produce alcohol.
After the sugar dissolves add lemon juice and yeast nutrient. These ingredients help balance acidity and support healthy yeast activity. Many people following a recipe for making apple wine also add a crushed Campden tablet at this stage to help control unwanted microorganisms.
Allow the mixture to sit for several hours if a Campden tablet is used. This waiting period helps ensure the environment is ready for fermentation. After that time the mixture can be transferred into the fermentation container.
Pour the prepared liquid carefully into the fermentation jug using a funnel. Leave some space at the top of the container so fermentation bubbles have room to expand. This small space is important when preparing the recipe for making apple wine because fermentation can become active during the first few days.
Before adding yeast make sure the liquid is at room temperature. If the mixture is too hot it may damage the yeast and stop fermentation.
Starting the Fermentation Process
Starting fermentation is the stage where the recipe for making apple wine truly begins to transform the apple mixture into wine. At this point yeast is added to the prepared juice and begins converting sugar into alcohol and carbon dioxide.
To begin this stage of the recipe for making apple wine, sprinkle the packet of wine yeast directly into the fermentation container. Some winemakers prefer to activate the yeast first by mixing it with a small amount of warm water. Either method can work as long as the temperature of the liquid remains moderate.
After adding yeast gently stir the mixture using a clean spoon. This helps distribute the yeast evenly throughout the liquid. Once the yeast is mixed in, place the stopper and airlock onto the fermentation container.
Within about twenty four hours small bubbles usually begin to appear in the airlock. These bubbles are a sign that fermentation has started. During this stage of the recipe for making apple wine, yeast consumes the sugars in the apple juice and slowly produces alcohol.
Fermentation activity is often strongest during the first several days. The bubbling may be frequent and the liquid may appear cloudy. This is normal and indicates the yeast is active.
Temperature plays an important role in the recipe for making apple wine. The fermentation container should be kept in a stable environment between about sixty five and seventy five degrees Fahrenheit. Consistent temperature helps yeast perform properly and prevents unwanted flavors.
It is also important not to open the container frequently during fermentation. Keeping the system sealed protects the wine from air exposure and contamination.
The primary fermentation stage in a recipe for making apple wine usually lasts about one to two weeks. During this time the bubbling gradually slows as the yeast consumes most of the sugar.
Primary Fermentation Timeline and What to Expect
Understanding the fermentation timeline is essential when following a recipe for making apple wine. During this stage yeast actively converts sugar into alcohol while the liquid slowly develops the flavor and aroma associated with homemade fruit wine.
The first few days of the recipe for making apple wine are usually the most active. Within one day small bubbles appear in the airlock. These bubbles show that yeast is consuming sugar and releasing carbon dioxide. The liquid may look cloudy and foam may form on the surface.
Between day three and day seven the recipe for making apple wine normally reaches peak fermentation. Bubbling becomes steady and sediment begins forming at the bottom of the container. This sediment is made of inactive yeast and natural particles from the apple juice.
As the first week passes fermentation slowly becomes less active. The bubbling sound becomes quieter and the wine gradually starts to clear. This change is a natural part of the recipe for making apple wine as the yeast finishes most of the available sugars.
Table 3: Typical Fermentation Stages
| Fermentation Stage | Approximate Time | What Happens |
|---|---|---|
| Fermentation begins | Day 1 to Day 2 | Yeast becomes active and bubbles appear |
| Strong fermentation | Day 3 to Day 7 | Rapid bubbling and cloudy liquid |
| Slowing fermentation | Day 8 to Day 14 | Bubbling decreases and sediment forms |
| Early clarification | Week 3 onward | Wine slowly becomes clearer |
After about two weeks the recipe for making apple wine usually moves into a slower fermentation phase. At this point the wine can be transferred into another clean container to separate it from sediment.
Patience is important during this stage. Allowing the wine enough time to ferment fully improves clarity and flavor balance.
Transferring the Wine and Secondary Fermentation
After the first stage of fermentation slows down the recipe for making apple wine moves to the next step called secondary fermentation. This stage improves clarity and allows the wine to mature more slowly.
During primary fermentation sediment collects at the bottom of the container. This layer is made of inactive yeast and small particles from the apple juice. If the wine sits on this sediment for too long it may affect the flavor. For this reason the recipe for making apple wine includes a process called racking which means transferring the liquid to a clean container.
To begin this step place a clean fermentation jug on a lower surface. Use a siphon tube or carefully pour the wine so the clear liquid moves into the new container while the sediment stays behind in the original container.
When transferring the wine during the recipe for making apple wine it is important to move the liquid slowly. Gentle handling prevents excess oxygen from entering the wine which could affect flavor and stability.
After transferring the wine attach the stopper and airlock again. At this stage fermentation continues but it becomes much slower. Small bubbles may still appear occasionally as the remaining sugar is converted into alcohol.
Secondary fermentation in a recipe for making apple wine usually lasts several weeks. During this time the wine gradually becomes clearer and the flavor begins to smooth out. Many home winemakers notice that the strong yeast aroma present during early fermentation becomes softer and more balanced.
Keeping the container in a cool and stable place helps the wine mature properly. A temperature that remains consistent allows the fermentation process to finish naturally.Once the wine becomes clearer and sediment stops forming rapidly the recipe for making apple wine moves into the aging stage which further improves flavor and texture. Aging the Apple Wine for Better Flavor
After secondary fermentation slows the recipe for making apple wine enters the aging stage. Aging allows the flavors to develop and helps the wine become smoother and clearer. Many beginners discover that patience during this stage greatly improves the final taste.
At this point in the recipe for making apple wine the liquid should already appear much clearer than during the early fermentation stage. Small amounts of sediment may still settle at the bottom of the container. If this happens the wine can be transferred again into another clean container to keep it separated from the sediment.
The aging period in a recipe for making apple wine typically lasts between one and three months. During this time the sharp yeast aromas slowly soften and the natural apple character becomes more noticeable. The wine also develops a more balanced structure.
The container should remain sealed with an airlock during aging. This protects the wine from air exposure and contamination. Keeping the container in a cool dark place is recommended because stable conditions help maintain the quality of the wine.
Many people following a recipe for making apple wine check the clarity every few weeks. As time passes the wine becomes brighter and the particles settle naturally at the bottom. Clear wine usually indicates that fermentation has finished and the wine is becoming stable.
Aging also allows flavors to blend together. Instead of tasting sharp or overly sweet the wine develops a smoother finish and a more refined aroma. This step is one of the reasons homemade apple wine can improve significantly over time.
Bottling the Apple Wine Safely
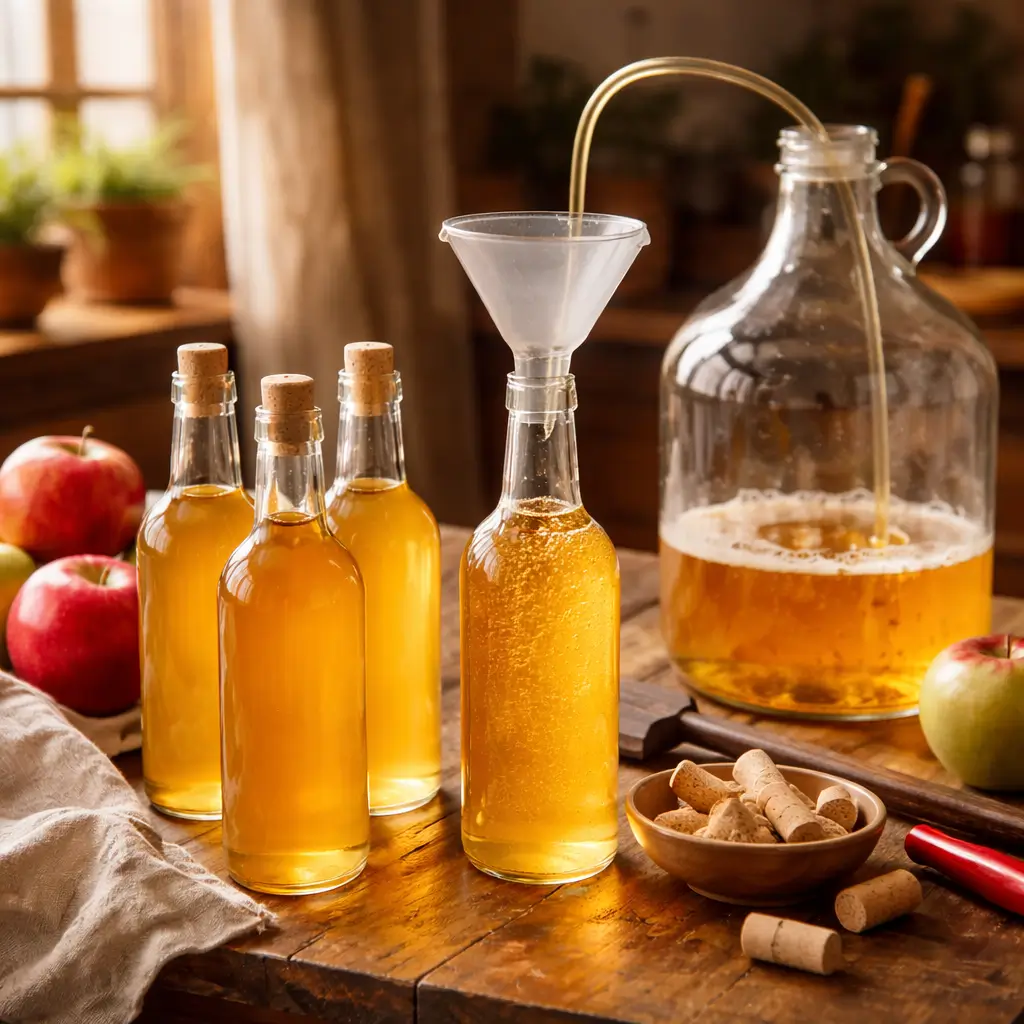
Bottling is an exciting step in the recipe for making apple wine because it means the fermentation process is complete and the wine is ready to be stored and enjoyed later. Proper bottling helps preserve flavor and prevents contamination.
Before bottling in the recipe for making apple wine make sure fermentation has fully finished. The wine should appear mostly clear and the airlock should show little or no bubbling activity. Bottling too early can cause pressure to build inside bottles.
Cleanliness remains extremely important at this stage of the recipe for making apple wine. All bottles corks and tools should be washed and sanitized before use. Clean equipment protects the wine from bacteria that could spoil the flavor.
Carefully transfer the wine from the fermentation container into clean bottles. Try to keep the sediment at the bottom of the container from entering the bottles. Clear wine produces a better appearance and a cleaner taste.
Many people following a recipe for making apple wine use glass wine bottles with corks or screw caps. Fill each bottle leaving a small amount of space near the top. This space allows the wine to expand slightly during storage.
Once the bottles are sealed they should be stored upright for the first few days so the cork can settle properly. After that the bottles may be placed on their sides if natural corks are used.
Even after bottling the recipe for making apple wine continues to improve with time. Allowing the bottles to rest for several additional weeks can help the flavors become smoother and more balanced.
Practical Tips for Successful Apple Wine
Following a recipe for making apple wine becomes much easier when a few important practices are respected. These tips help beginners avoid common problems and produce wine with a cleaner taste and better clarity.
One of the most important rules in any recipe for making apple wine is maintaining cleanliness. All containers tools and bottles should be properly sanitized before touching the juice or wine. Even small amounts of unwanted bacteria can affect fermentation and change the flavor.
Choosing good quality apple juice is another key factor in a successful recipe for making apple wine. The juice should not contain preservatives such as potassium sorbate because these chemicals can stop yeast activity. Fresh pressed juice or natural apple juice usually works best.
Temperature control is also important during fermentation. A stable environment helps yeast perform consistently. When following a recipe for making apple wine most home brewers keep the fermentation container in a room between sixty five and seventy five degrees Fahrenheit.
Patience plays a major role in the process. Many beginners want to rush the fermentation stage but allowing enough time improves flavor and clarity. A well fermented recipe for making apple wine often tastes smoother after several weeks of aging.
Using a balanced mix of apple varieties can also improve flavor. Some apples add sweetness while others contribute acidity and aroma. Experimenting with different apple types can help create a more complex wine.
Monitoring the wine occasionally is helpful but frequent opening of the container should be avoided. Keeping the container sealed protects the wine from oxygen exposure.
By applying these simple practices the recipe for making apple wine becomes more reliable and enjoyable for beginners who want to explore homemade fermentation.
Step by Step Recipe for Making Apple Wine
This section summarizes the full recipe for making apple wine in a simple step by step format. Following these steps carefully helps beginners understand the complete fermentation process from preparation to aging.
Step 1
Prepare one gallon of preservative free apple juice. Pour the juice into a clean pot and gently warm it. Add two to three cups of sugar and stir until the sugar dissolves completely.
Step 2
Add one teaspoon of yeast nutrient and two tablespoons of lemon juice. Stir the mixture well so the ingredients combine evenly.
Step 3
Transfer the liquid into a clean fermentation jug using a funnel. Leave a small amount of space at the top of the container.
Step 4
Sprinkle one packet of wine yeast into the container. Stir gently so the yeast spreads through the liquid.
Step 5
Attach the stopper and airlock to the container. Place the container in a room with a stable temperature.
Step 6
Allow the primary fermentation stage to continue for about one to two weeks. During this stage bubbling in the airlock shows that the recipe for making apple wine is fermenting correctly.
Step 7
Once bubbling slows transfer the wine carefully into another clean container. This separates the liquid from sediment that formed during fermentation.
Step 8
Allow secondary fermentation to continue for several more weeks. During this period the recipe for making apple wine becomes clearer and develops smoother flavor.
Step 9
When fermentation has finished and the wine appears clear transfer it into clean bottles and seal them.
Step 10
Store the bottles in a cool dark place for several weeks to allow the wine to mature before drinking.
This step by step recipe for making apple wine helps beginners follow the fermentation process with confidence and produce a balanced homemade fruit wine.
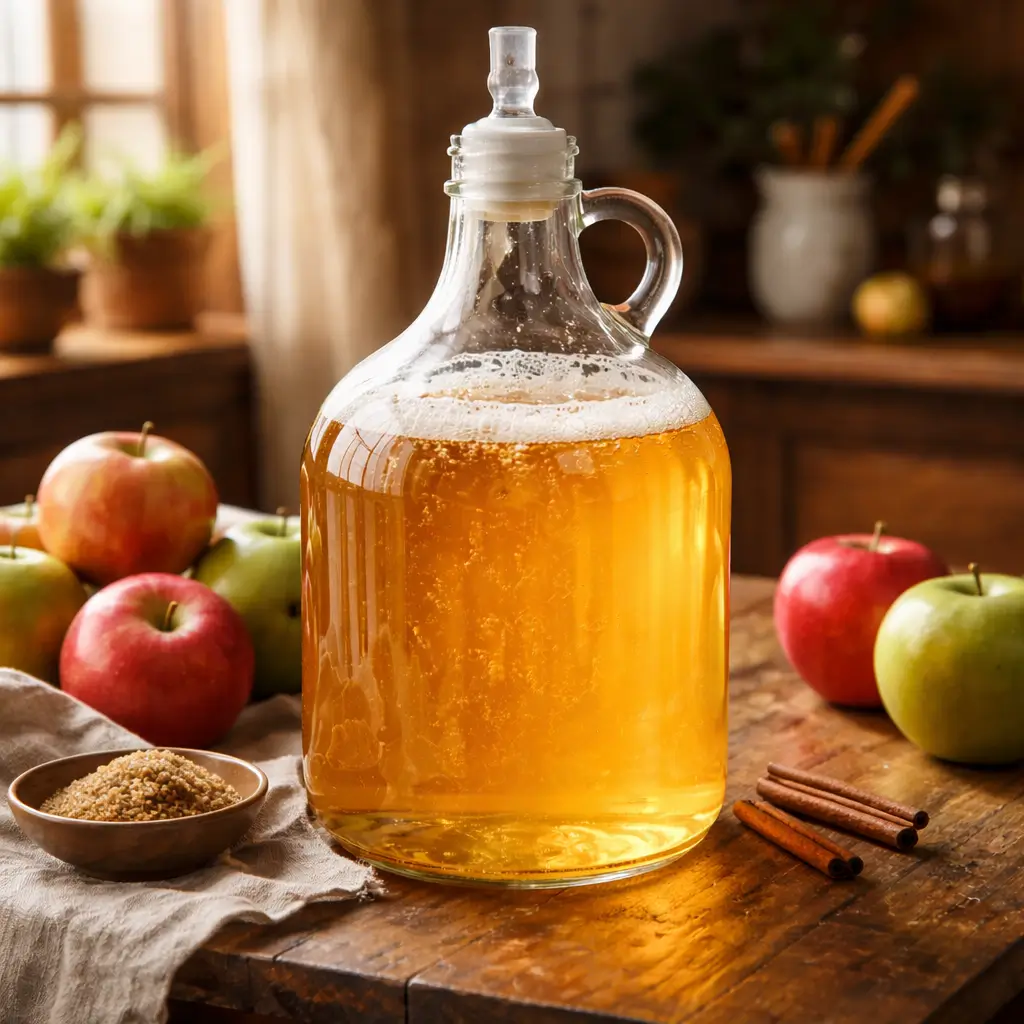
How to Store Apple Wine Properly
Proper storage is an important final stage in the recipe for making apple wine. After fermentation and bottling the wine should be stored correctly so its flavor and aroma continue to improve.
The first rule in the recipe for making apple wine storage is keeping the bottles in a cool and stable environment. A temperature that stays fairly consistent helps protect the wine from rapid aging or flavor changes. Many home winemakers store bottles in a basement pantry or dark cabinet.
Light exposure should also be minimized. Strong light can slowly affect the quality of wine. When storing bottles from a recipe for making apple wine it is best to place them in a dark area where sunlight does not reach them.
Bottle position may also matter depending on the closure used. If natural corks are used many winemakers store bottles on their side. This helps keep the cork slightly moist and prevents air from entering the bottle.
The storage environment should also remain calm and free from frequent movement. Allowing bottles from a recipe for making apple wine to rest undisturbed helps the wine mature and stabilize.
Many apple wines become smoother after several weeks of storage. Some home brewers allow bottles to rest for two or three months before opening them. During this time the flavors blend together and the aroma becomes more balanced.
Proper storage ensures the effort spent on the recipe for making apple wine results in a drink that remains enjoyable and stable over time.
Common Mistakes to Avoid When Making Apple Wine
Even though the recipe for making apple wine is beginner friendly some common mistakes can affect the final quality. Understanding these issues helps home winemakers produce better results and avoid problems during fermentation.
One common mistake in the recipe for making apple wine is using apple juice that contains preservatives. Ingredients such as potassium sorbate or sodium benzoate can prevent yeast from working properly. When yeast cannot grow fermentation may stop completely.
Another mistake in the recipe for making apple wine is poor sanitation. Fermentation containers spoons funnels and bottles should always be sanitized before use. Unclean equipment can introduce unwanted bacteria that may cause sour or unpleasant flavors.
Temperature problems can also affect fermentation. If the environment is too cold yeast may become inactive. If it becomes too warm fermentation may proceed too quickly and create harsh flavors. Maintaining a stable temperature helps the recipe for making apple wine develop balanced results.
Many beginners also rush the process. Fermentation and aging both require time. Opening bottles too early may result in cloudy wine or unfinished fermentation. Allowing enough time helps the recipe for making apple wine become clearer and smoother.
Another mistake is transferring the wine carelessly when removing sediment. Rough handling may introduce oxygen which can affect flavor stability. Gentle transfers help maintain the quality of the wine.
By avoiding these common mistakes the recipe for making apple wine becomes much more reliable for beginners. Careful preparation patience and cleanliness greatly increase the chance of producing a pleasant homemade wine.
Conclusion
Learning a recipe for making apple wine at home is a rewarding way to explore fermentation and create a unique fruit wine using simple ingredients. Apples provide natural sugars and acidity that make them well suited for fermentation, which is why many beginners choose this project as their first homemade wine experiment.
By following a clear recipe for making apple wine and maintaining proper cleanliness, anyone can produce a balanced and enjoyable drink. The process mainly involves preparing apple juice, adding sugar and yeast, allowing fermentation to occur, then aging the wine until it becomes smooth and clear.
Patience plays an important role throughout the recipe for making apple wine. Fermentation may take several weeks, and additional aging time allows the flavors to become more refined. Rushing the process can affect clarity and taste, while careful handling produces better results.
Homemade apple wine also offers flexibility. Different apple varieties can create different flavor profiles, allowing each batch to develop its own character. Some winemakers prefer a dry finish while others enjoy a slightly sweeter style.
With basic equipment, proper sanitation, and time for fermentation and aging, the recipe for making apple wine can produce a refreshing homemade beverage that reflects both traditional techniques and personal creativity.
FAQ
1. How long does apple wine take to ferment
A typical recipe for making apple wine begins fermentation within twenty four hours after yeast is added. Primary fermentation usually lasts one to two weeks. Secondary fermentation and aging may take several additional weeks. Most home winemakers allow the wine to mature for one to three months before drinking. Allowing enough time improves clarity and flavor.
2. Can apple wine be made without special equipment
Yes, a simple recipe for making apple wine can be completed with basic household items such as a glass jug, funnel, and clean bottles. However, using a fermentation airlock and proper sanitation tools helps control the process and protect the wine from contamination. These tools are inexpensive and make fermentation much more reliable.
3. What type of apples work best for apple wine
Many people following a recipe for making apple wine combine both sweet and tart apples. Sweet apples contribute sugar while tart apples provide acidity and brightness. Popular varieties used in home winemaking include Fuji, Gala, Honeycrisp, and Granny Smith. Mixing varieties often produces a more balanced flavor.
4. How should homemade apple wine be stored
After bottling a recipe for making apple wine should be stored in a cool dark place with a stable temperature. Basements or dark cabinets work well. Bottles should remain sealed and undisturbed while the wine matures. Proper storage allows the wine to maintain its flavor and clarity for many months.
5. Why is my apple wine cloudy
Cloudiness during a recipe for making apple wine is common during early fermentation. Yeast particles and natural fruit sediment cause the liquid to appear cloudy. With time these particles settle at the bottom of the container. Allowing the wine to age and transferring it carefully away from sediment usually results in clear wine.
Follow Us Facebook
recipe for making apple wine
Ingredients
Equipment
Method
- Pour apple juice into a large clean pot.
- Add sugar and stir until fully dissolved.
- Mix in lemon juice and yeast nutrient.
- Transfer the liquid into a sanitized fermentation jug using a funnel.
- Sprinkle wine yeast into the container and stir gently.
- Attach airlock and place the container in a stable room temperature area.
- Allow fermentation to continue for one to two weeks.
- Transfer the wine carefully into another clean container to remove sediment.
- Let the wine age several weeks until clear.
- Bottle the wine and store in a cool dark place.