
Two simple ingredients gelatin gummy recipe searches often begin with, but the real magic goes far beyond that simplicity. Homemade gummies have exploded in popularity across the United States because they’re customizable, budget friendly, and surprisingly easy to make.
In many American kitchens today, a gelatin gummy recipe has become a go to project for parents, health conscious snackers, and even meal prep enthusiasts. Store bought gummies often contain artificial colors, excess sugar, and preservatives. When you make them at home, you control every ingredient from the type of juice to the sweetness level.
Beyond convenience, homemade gummies offer flexibility. Want sugar free? Prefer organic fruit juice? Need vitamin infused snacks for kids? All possible.
They also fit multiple lifestyles:
- High protein snack option
- Lunchbox friendly treat
- Post workout collagen boost
- Fun weekend kitchen project
What truly sets them apart is texture control. You decide whether they’re soft and chewy or firm and bouncy something no packaged product can personalize for you.
As we move forward, you’ll learn exactly what gelatin gummies are, how they work chemically, and how to master them step by step.Gelatin Trick Recipe Ingredients You Need to Know
What Are Gelatin Gummies Made Of?
At their core, gelatin gummies are structured, elastic candies made by combining liquid, sweetener, and gelatin. The key ingredient gelatin is a protein derived from collagen, which gives gummies their signature bounce and chew.
Unlike pectin based candies (often used in vegan gummies), gelatin creates a firmer, more elastic texture. That stretchiness is what most Americans expect from traditional gummy bears and fruit chews.
Here’s a simple breakdown of the core components:
| Ingredient | Role in the Recipe | Why It Matters |
|---|---|---|
| Gelatin (unflavored) | Structural base | Creates firmness and chew |
| Fruit Juice or Liquid | Flavor + hydration | Determines taste and color |
| Sweetener (optional) | Enhances flavor | Balances tartness |
| Citric Acid (optional) | Adds tang | Boosts fruit intensity |
There are two common forms of gelatin used in U.S. kitchens:
- Powdered unflavored gelatin (most common and easiest to measure)
- Gelatin sheets (less common but produce a very smooth texture)
Why gelatin works:
When gelatin is dissolved in warm liquid and then cooled, its proteins form a flexible network. This traps water inside, creating a soft, elastic gel. The ratio of gelatin to liquid determines firmness more gelatin equals firmer gummies.
Because you control this ratio, homemade gummies can range from soft snack style cubes to firm candy style bears.
Ingredients & Exact Measurements for the Perfect Gelatin Gummy Recipe
If you want consistent results every time, precision matters. A great gelatin gummy recipe depends on the correct ratio of liquid to gelatin. Too little gelatin and your gummies will be soft and sticky. Too much and they’ll turn rubbery.
Below is a reliable base formula that works for beginners and experienced home cooks alike.
Base Gelatin Gummy Recipe (Standard Batch US Measurements)
Ingredients:
- 2 cups 100% fruit juice (no pulp preferred)
- 4 tablespoons unflavored powdered gelatin
- 2 to 4 tablespoons honey or sugar (adjust to taste)
- 1 tablespoon lemon juice (optional, enhances flavor)
This gelatin gummy recipe yields about 80 to 100 small gummies, depending on mold size.
Why This Ratio Works
A balanced gelatin gummy recipe typically uses 2 tablespoons of gelatin per 1 cup of liquid. This ratio produces gummies that are:
- Firm but chewy
- Not rubbery
- Easy to remove from molds
- Stable at room temperature for short periods
If you prefer firmer candy style gummies, increase gelatin to 5 tablespoons total. For softer snack style gummies, reduce to 3 tablespoons.
Choosing the Right Juice
The flavor of your gelatin gummy recipe depends heavily on the juice you use. Popular U.S. options include:
- Apple juice (mild and kid friendly)
- Grape juice (classic gummy flavor)
- Cherry juice (bold and vibrant)
- Orange juice (bright and slightly tangy)
Avoid fresh pineapple, kiwi, or papaya unless heated first these contain enzymes that prevent gelatin from setting.
Mastering these ingredient ratios is the foundation of every successful gelatin gummy recipe.
Step by Step Instructions for the Best Gelatin Gummy Recipe
Now that you have the right ratios, it’s time to bring your gelatin gummy recipe to life. Follow these exact steps to ensure a smooth texture, vibrant flavor, and perfectly set gummies every time.
Step 1: Bloom the Gelatin
Pour ½ cup of your fruit juice into a small bowl. Sprinkle the gelatin evenly over the surface. Let it sit undisturbed for 5 to 10 minutes.
This process, called blooming, allows the gelatin to absorb liquid properly. Skipping this step can cause clumps in your gelatin gummy recipe.
Step 2: Heat the Remaining Juice
In a small saucepan, pour the remaining 1½ cups of juice. Warm it over low to medium heat. Do not boil. The liquid should be hot but not simmering (around 160 to 180°F).
Boiling can weaken gelatin structure and affect the final texture of your gelatin gummy recipe.
Step 3: Dissolve the Gelatin
Add the bloomed gelatin mixture to the warm juice. Stir continuously until completely dissolved. This usually takes 2 to 3 minutes.
Make sure there are no visible granules. A smooth mixture ensures even firmness throughout your gelatin gummy recipe.
Step 4: Add Sweetener & Flavor Enhancers
Stir in honey, sugar, or lemon juice if using. Taste the mixture carefully (let it cool slightly first). Adjust sweetness if needed.
Remember: flavors become slightly milder once chilled.
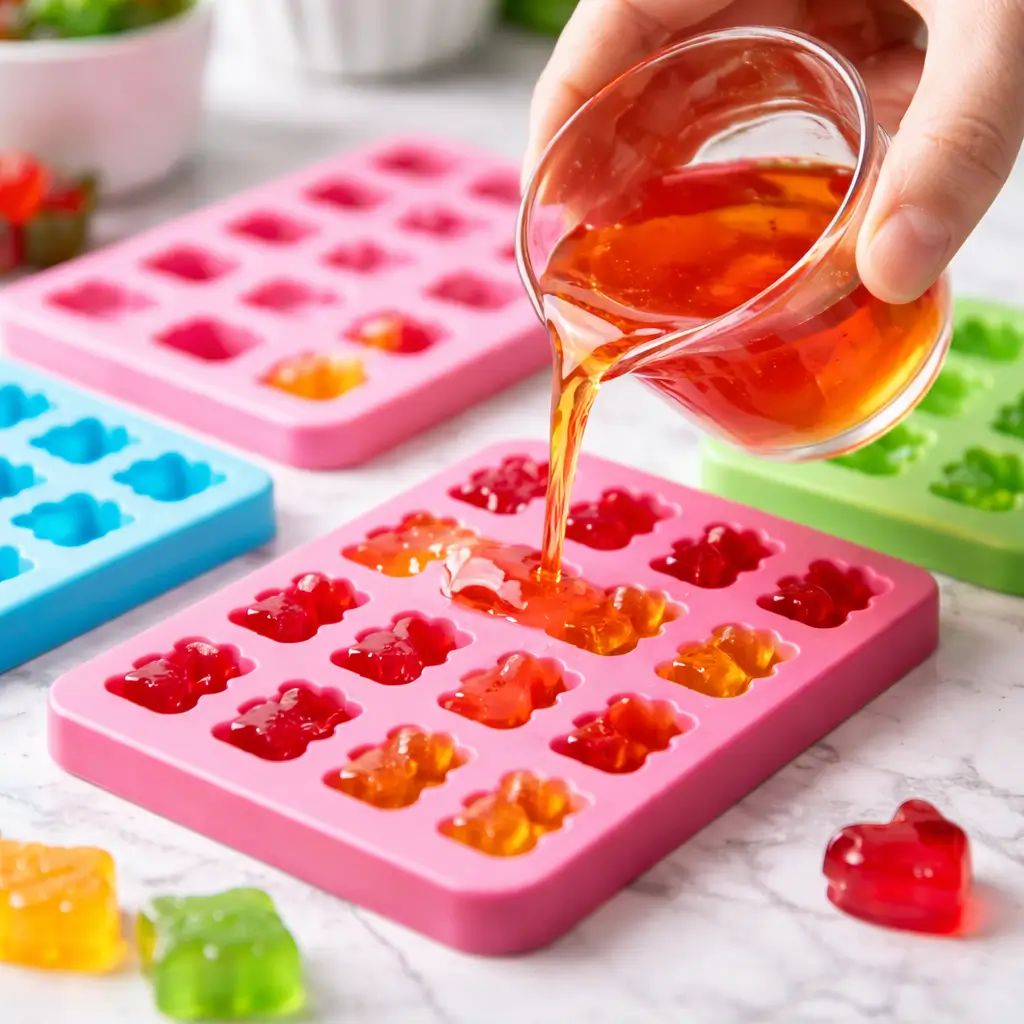
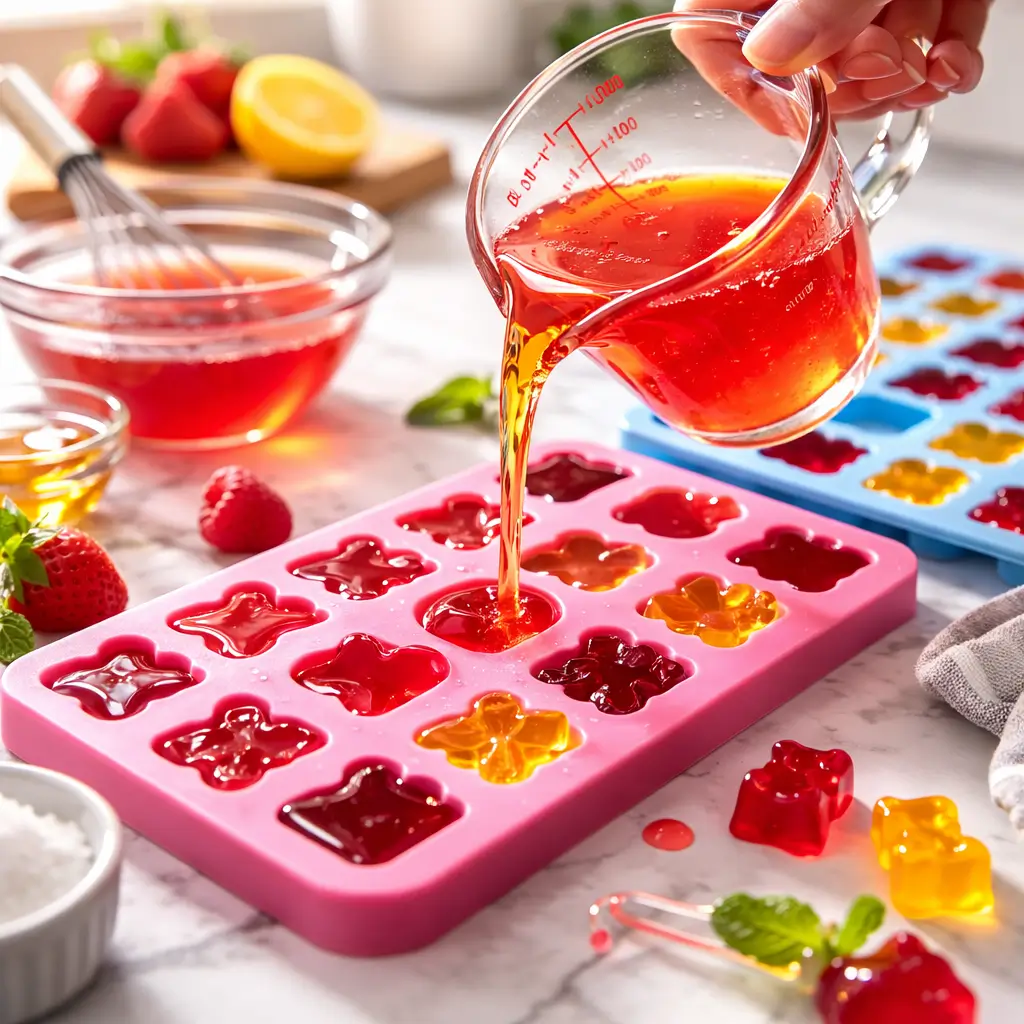
Step 5: Pour Into Molds
Using a dropper or measuring cup with a spout, carefully pour the mixture into silicone molds. Work slowly to avoid air bubbles.
Place molds on a flat tray before moving them to the refrigerator.
Step 6: Chill Until Set
Refrigerate for at least 1 to 2 hours. Gummies should feel firm to the touch and peel out easily.
If they stick, they may need more chilling time.
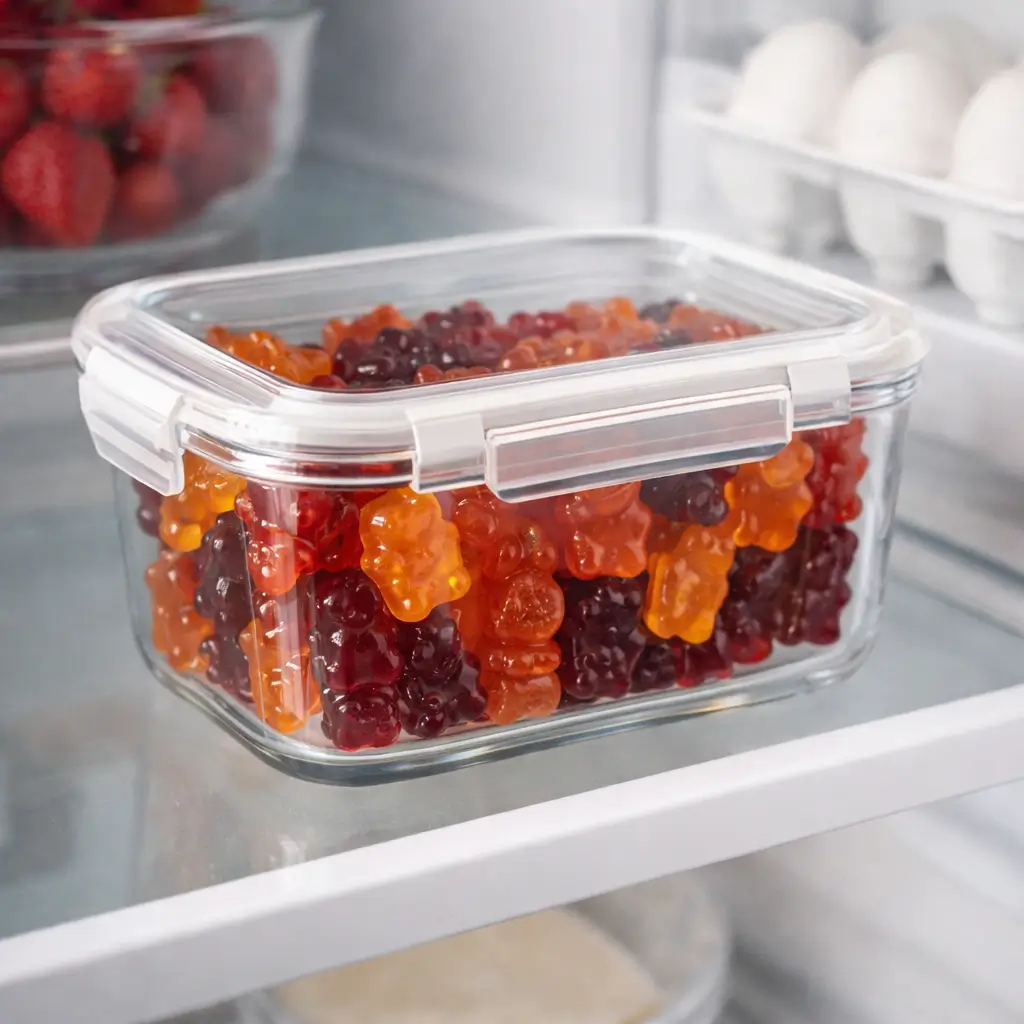
Once fully set, your gelatin gummy recipe is complete. Store them in an airtight container in the refrigerator.
How to Control Texture in Your Gelatin Gummy Recipe
Texture is what separates an average batch from an exceptional gelatin gummy recipe. Whether you prefer soft snack style cubes or firm, candy like bites, small adjustments make a big difference.
The firmness of any gelatin gummy recipe depends on three main factors:
- Gelatin to liquid ratio
- Cooling time
- Sugar content
Below is a quick reference guide to help you customize consistency.
Texture Control Table
| Texture Style | Gelatin Amount (per 2 cups liquid) | Result |
|---|---|---|
| Soft & Snackable | 3 tablespoons | Tender, slightly bouncy |
| Classic Chewy | 4 tablespoons | Balanced firmness |
| Extra Firm / Candy | 5 tablespoons | Dense and springy |
If your gelatin gummy recipe turns out too soft:
- Increase gelatin by ½ tablespoon next batch
- Chill longer (minimum 2 hours)
- Avoid overly diluted juice
If your gelatin gummy recipe feels rubbery:
- Reduce gelatin slightly
- Add 1 to 2 tablespoons extra juice
- Avoid overheating during cooking
The Role of Sugar
Sugar doesn’t just sweeten. It affects structure. Higher sugar levels can create a firmer bite, while low sugar versions tend to be softer.
Why Temperature Matters
Gelatin sets best between 35 to 40°F. Rapid chilling improves structure, but freezing is not recommended it can alter the protein network and ruin your gelatin gummy recipe texture.
Flavor Variations to Upgrade Your Gelatin Gummy Recipe
Once you master the base method, customizing your gelatin gummy recipe becomes the fun part. You can tailor flavor, sweetness, nutrition, and even color all without artificial additives.
Below are the most popular variations in U.S. home kitchens.
1. 100% Fruit Juice Gummies (Naturally Sweet)
For a cleaner gelatin gummy recipe, use pure fruit juice with no added sugar. Apple, white grape, and cherry juice work especially well.
Pro Tip: Add 1 tablespoon fresh lemon juice to brighten flavor without increasing sugar.
2. Sugar Free Gelatin Gummy Recipe
To make a sugar free gelatin gummy recipe:
- Use unsweetened juice
- Add 1 to 2 tablespoons monk fruit or erythritol
- Taste before pouring into molds
Sugar free versions may be slightly softer, so increase gelatin by ½ tablespoon for better structure.
3. Vitamin Infused Gummies
Many parents in the U.S. use a gelatin gummy recipe to create homemade vitamin snacks.
How to do it safely:
- Let the mixture cool slightly (warm, not hot)
- Stir in powdered vitamins or liquid supplements
- Mix thoroughly before molding
Avoid high heat after adding vitamins to preserve potency.
4. Layered Gummies (Two Flavor Style)
For a visually impressive gelatin gummy recipe:
- Pour first flavor into molds halfway.
- Chill 30 to 40 minutes until semi set.
- Pour second flavor on top.
- Refrigerate until fully firm.
This creates professional looking, two tone gummies.
5. Creamy Gummies (Smooth & Dessert Like)
Replace ½ cup juice with coconut milk or light cream for a softer, richer gelatin gummy recipe. These resemble yogurt style fruit snacks and are especially popular with kids.
Customizing your gelatin gummy recipe allows you to control ingredients, nutrition, and creativity all from your own kitchen.
Storage, Shelf Life, and Food Safety
Proper storage is essential to maintain texture, flavor, and freshness. A well made gelatin gummy recipe can last surprisingly long when stored correctly, but moisture and air exposure will quickly degrade quality.
How to Store Homemade Gummies
After your gelatin gummy recipe has fully set:
- Remove gummies from molds completely
- Pat dry if condensation appears
- Store in an airtight container
- Keep refrigerated at 35 to 40°F
Avoid stacking them while warm, as this can cause sticking.
For best results, place a small piece of parchment paper between layers if storing large batches.
How Long Do They Last?
A standard gelatin gummy recipe stored in the refrigerator will last:
- 7 to 10 days with fresh juice
- Up to 2 weeks if made with pasteurized juice
- 3 to 5 days if using fresh squeezed citrus juice
Always check for:
- Sour smell
- Excess moisture
- Slimy texture
If any of these appear, discard immediately.
Can You Freeze Gelatin Gummies?
Freezing is not recommended for most gelatin gummy recipe batches. While technically possible, freezing can:
- Alter the protein structure
- Create a watery texture when thawed
- Reduce chewiness
Refrigeration is the safest and most reliable storage method.
Room Temperature Storage
If your gelatin gummy recipe is extra firm (higher gelatin ratio), it may sit at room temperature for several hours ideal for lunchboxes. However, long term storage should always be refrigerated.
Common Mistakes in a Gelatin Gummy Recipe (And How to Fix Them)
Even a simple gelatin gummy recipe can go wrong if small details are overlooked. The good news? Every issue has a clear fix. Understanding these common mistakes will help you get consistent, professional quality results every time.
1. Gummies Won’t Set
Cause:
- Not enough gelatin
- Fresh pineapple, kiwi, or papaya juice
- Boiling the mixture too aggressively
Fix:
Increase gelatin by ½ to 1 tablespoon per 2 cups liquid. If using fresh tropical fruits, heat the juice first to deactivate enzymes before adding gelatin.
2. Rubbery or Too Firm Texture
Cause:
- Too much gelatin
- Over reduction of liquid during heating
Fix:
Reduce gelatin slightly in your next gelatin gummy recipe batch or add 1 to 2 tablespoons extra juice before molding.
3. Cloudy or Foamy Gummies
Cause:
- Whisking too aggressively
- Pouring too quickly
Fix:
Stir gently instead of whisking. Let mixture rest for 1 to 2 minutes before pouring to allow bubbles to rise.
4. Sticky Surface
Cause:
- High humidity
- Improper storage
- Not enough chill time
Fix:
Refrigerate uncovered for 30 minutes before sealing in a container. Lightly dust with cornstarch if needed.
5. Weak Flavor
Cause:
- Diluted juice
- Not enough acid balance
Fix:
Add 1 tablespoon lemon juice or a pinch of citric acid. Remember, flavor softens after chilling.
Mastering these adjustments ensures every gelatin gummy recipe turns out just right firm, flavorful, and clean tasting.
Nutritional Breakdown Homemade vs Store Bought Gummies
One major reason Americans search for a gelatin gummy recipe is ingredient control. When you make gummies at home, you eliminate artificial dyes, high fructose corn syrup, and preservatives commonly found in commercial brands.
Let’s compare a typical homemade gelatin gummy recipe with a standard store bought fruit gummy serving.
Nutrition Comparison Table
| Feature | Homemade Gelatin Gummy Recipe | Store Bought Gummies |
|---|---|---|
| Main Sweetener | Honey or natural juice | Corn syrup, sugar |
| Artificial Colors | None (unless added) | Often included |
| Protein | 1 to 2g per serving (from gelatin) | Usually 0g |
| Preservatives | None | Common |
| Ingredient Control | Full control | None |
Protein & Collagen Benefits
Because gelatin is derived from collagen, a gelatin gummy recipe naturally contains small amounts of protein. While not a high protein snack, it does provide amino acids like glycine and proline, which support connective tissue health.
Sugar Considerations
A homemade gelatin gummy recipe allows you to:
- Reduce sugar
- Use sugar free alternatives
- Rely solely on fruit sweetness
Store bought versions often contain 15 to 20 grams of added sugar per serving.
Calorie Estimate (Homemade Batch)
For a basic gelatin gummy recipe using 2 cups juice and 2 tablespoons honey:
- Approximately 20 to 30 calories per 5 to 6 gummies
- Around 4 to 6 grams natural sugar
Exact numbers depend on juice choice and sweetener amount.
Homemade gummies aren’t a health supplement but they are a smarter snack option when prepared thoughtfully.
Creative Ways to Serve Your Gelatin Gummy Recipe
Once you’ve mastered a basic gelatin gummy recipe, presentation becomes the next level. Gummies aren’t just snacks they can be colorful, creative, and surprisingly versatile in everyday life.
Here’s how to make your gelatin gummy recipe stand out.
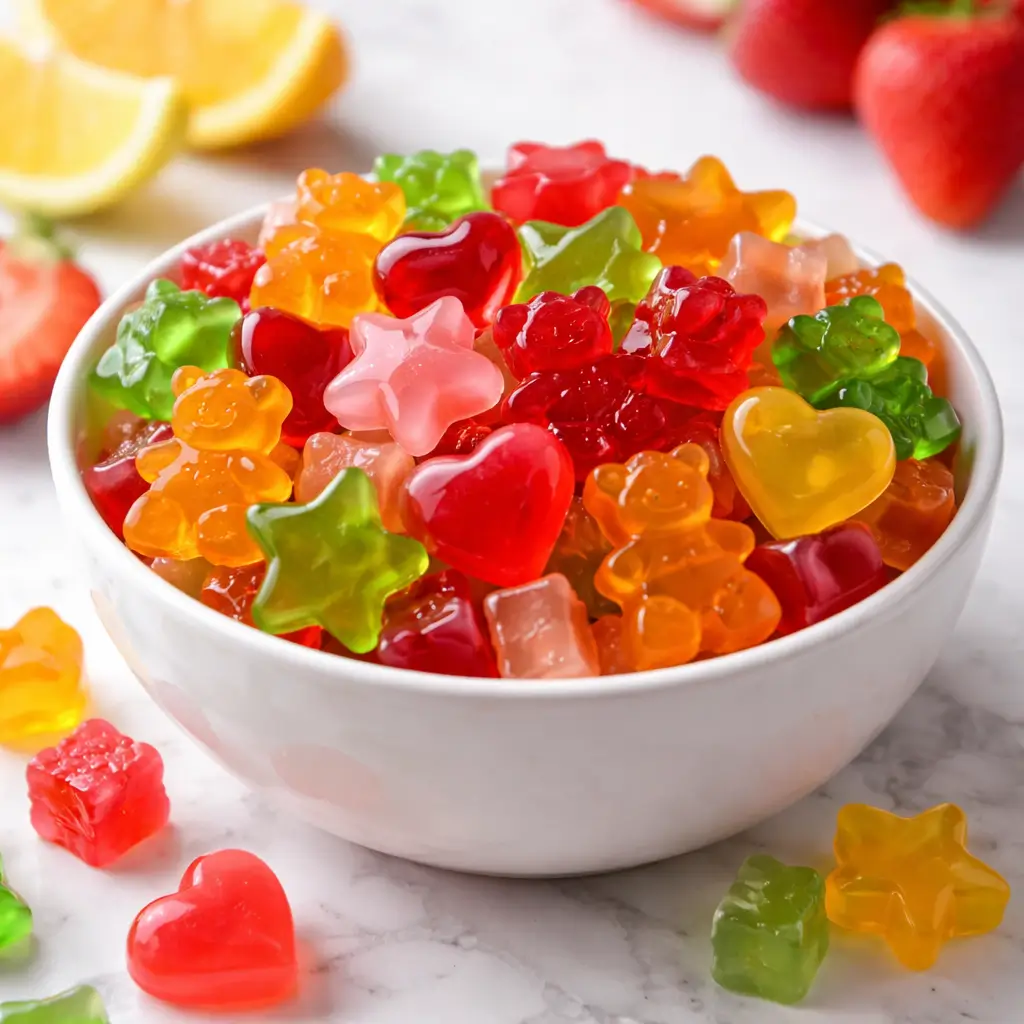
1. Lunchbox Friendly Shapes
Use small silicone molds in fun shapes:
- Stars
- Hearts
- Bears
- Letters
Smaller molds help portion control and make your gelatin gummy recipe more appealing for kids.
2. Party Candy Board Addition
Add homemade gummies to a dessert or snack board alongside:
- Fresh fruit
- Dark chocolate pieces
- Nuts
- Cheese cubes
Because your gelatin gummy recipe contains no artificial colors, it pairs beautifully with whole foods.
3. Post Workout Snack Bites
If you’re using collagen rich gelatin, your gelatin gummy recipe can double as a light protein boost after workouts. Pair with Greek yogurt or a smoothie for a balanced snack.
4. Holiday Themed Gummies
Change juice colors to match seasons:
- Red & green (Christmas)
- Orange (Halloween)
- Red, white & blue layered (Fourth of July)
Layering techniques elevate your gelatin gummy recipe into a decorative treat.
5. Meal Prep Snack Packs
Prepare weekly snack containers with 8 to 10 gummies per portion. Stored properly, your gelatin gummy recipe stays fresh up to a week, making it ideal for busy households.
Creative presentation turns a simple gelatin gummy recipe into something memorable, practical, and share worthy.
Advanced Techniques for Professional Quality Gummies
If you want your homemade gummies to look and feel like store quality candy, small technique adjustments make a noticeable difference. Clarity, shine, and structure all depend on how you handle the mixture before it sets.
How to Get Clearer Gummies
For crystal clear results:
- Use filtered juice without pulp
- Stir gently instead of whisking
- Let the mixture rest briefly before pouring
- Strain through a fine mesh sieve if needed
Air bubbles are the main reason gummies look cloudy. Slow handling prevents this.
Creating a Glossy Finish
To achieve a smooth, shiny surface:
- Lightly brush silicone molds with a neutral oil
- Refrigerate uncovered for the first 20 minutes
- Allow gummies to air dry briefly after unmolding
Proper setting time improves both appearance and texture.
Making Them More Stable at Room Temperature
If you plan to pack them in lunchboxes or serve at events:
- Increase gelatin slightly
- Chill fully for at least 2 hours
- Avoid excess liquid sweeteners
These steps strengthen the structure and prevent softening.
Improving Flavor Balance
If the taste feels flat:
- Add 1 teaspoon lemon juice
- Or a small pinch of citric acid
Acidity brightens fruit flavors without extra sugar.
Scaling Up Batches
To double the recipe:
- Maintain the same liquid to gelatin ratio
- Bloom gelatin separately
- Heat gently and evenly
Consistency always depends on ratio control and proper blooming.
Complete Gelatin Gummy Recipe (Quick Reference Guide)
Now that you understand texture, flavor control, and troubleshooting, here is the complete gelatin gummy recipe summarized in one clear, easy to follow format.
This version is optimized for consistency, balanced chew, and reliable results in U.S. home kitchens.
Ingredients (Standard Batch)
- 2 cups 100% fruit juice (no pulp)
- 4 tablespoons unflavored powdered gelatin
- 2 to 4 tablespoons honey or sugar (adjust to taste)
- 1 tablespoon lemon juice (optional)
Yield: Approximately 80 to 100 small gummies
Step by Step Instructions
- Pour ½ cup juice into a bowl and sprinkle gelatin evenly over it. Let sit 5 to 10 minutes to bloom.
- Heat remaining 1½ cups juice in a saucepan over low medium heat (do not boil).
- Add bloomed gelatin to warm juice and stir gently until fully dissolved.
- Stir in sweetener and optional lemon juice.
- Carefully pour mixture into silicone molds.
- Refrigerate 1 to 2 hours until fully firm.
- Remove from molds and store in an airtight container in the refrigerator.
Texture Adjustment Guide
- Softer gummies: Use 3 tablespoons gelatin
- Firmer gummies: Use 5 tablespoons gelatin
- Extra stability for warmer rooms: Chill at least 2 hours
This gelatin gummy recipe serves as your foundation. From here, you can experiment with layered flavors, sugar free options, or vitamin enhancements without changing the core method.
Meal Prep Strategy & Long Term Success
Making a single batch is easy. Making it consistently with the same texture and flavor every time requires a simple system. If you plan to prepare this regularly, organization matters.
Weekly Prep Plan
For families or snack prep:
- Make one double batch on Sunday
- Divide into 5 to 7 small airtight containers
- Store at the back of the refrigerator (coldest zone)
- Keep containers sealed until needed
Pre portioning prevents repeated air exposure, which helps maintain firmness.
Best Containers for Storage
Choose:
- Glass airtight containers
- BPA free snack containers
- Silicone reusable pouches
Avoid loosely sealed plastic bags they allow moisture fluctuation.
Preventing Stickiness Over Time
If gummies begin sticking after several days:
- Place parchment between layers
- Refrigerate uncovered for 20 minutes to remove surface moisture
- Lightly dust with a small amount of cornstarch if needed
Humidity is the most common cause of surface tackiness.
Scaling for Events or Parties
If preparing larger quantities:
- Multiply ingredients while maintaining the same liquid to gelatin ratio
- Bloom gelatin in separate bowls before combining
- Use multiple trays to prevent overcrowding in the refrigerator
Consistency always depends on maintaining proper ratios and gentle heating.
You now have everything needed to make reliable, customizable homemade gummies.
Conclusion
Homemade gelatin gummy recipe success comes down to understanding simple ratios, gentle heat, and proper chilling time. When you control the ingredients, you control the outcome flavor, sweetness, firmness, and even nutritional value.
Unlike store bought options filled with artificial additives and excess sugar, homemade gummies give you transparency and flexibility. You can create fruit based snacks for kids, collagen rich bites for post workout fuel, or sugar free options tailored to your lifestyle.
The process is straightforward: bloom the gelatin, warm the juice, combine carefully, and chill until firm. Small adjustments allow you to fine tune texture from soft and snackable to firm and candy like. With proper storage, your gummies stay fresh for up to a week, making them ideal for meal prep.
Once you master the base method, endless variations become possible. This recipe isn’t just about making candy it’s about building a reliable, customizable snack you can confidently recreate anytime in your kitchen.
FAQ
1. How long do homemade gelatin gummies last?
Homemade gelatin gummies typically last 7 to 10 days when stored in an airtight container in the refrigerator. If you use freshly squeezed juice, shelf life may shorten to about 3 to 5 days due to natural enzymes and the absence of preservatives. For maximum freshness, keep gummies sealed and stored in the coldest section of your refrigerator (not the door). Always inspect before eating discard if you notice sour smells, excess moisture, cloudiness, or a slimy texture. Proper chilling and airtight storage are key to maintaining firmness and flavor throughout the week.
2. Should gelatin gummies be stored in the fridge?
Yes, refrigeration is highly recommended for homemade gelatin gummies. Gelatin maintains its structure best at temperatures between 35 to 40°F, which helps preserve firmness and chewiness. While firmer gummies can remain at room temperature for several hours (such as in lunchboxes or parties), extended exposure to warmth can cause softening and stickiness. Freezing is not advised because thawing can create condensation and alter texture. For best results, store gummies in airtight containers and avoid repeated temperature changes that can affect consistency.
3. Why didn’t my gummies set properly?
The most common reason gummies fail to set is an incorrect gelatin to liquid ratio. A reliable standard is 2 tablespoons of gelatin per 1 cup of juice. Using too much liquid or not blooming the gelatin properly can weaken structure. Fresh pineapple, kiwi, and papaya also contain natural enzymes that prevent setting unless heated first. Additionally, boiling the mixture can damage gelatin’s protein structure. To fix the issue, ensure proper blooming, avoid high heat, and slightly increase gelatin in your next batch for better firmness.
4. Can I make sugar free gelatin gummies?
Yes, sugar free gummies are easy to make. Use unsweetened fruit juice and add alternatives like monk fruit or erythritol to taste. Because sugar slightly contributes to structure, you may need to increase gelatin by about ½ tablespoon to maintain firmness. Taste the mixture before pouring into molds, as sweetness reduces slightly after chilling. Keep in mind that sugar substitutes may produce a slightly softer texture, but with the correct gelatin ratio, you can still achieve a satisfying chew without added sugar.
5. Can I add vitamins or supplements to homemade gummies?
Yes, you can add vitamins or powdered supplements, but temperature control is essential. Allow the mixture to cool to warm (not hot) before stirring them in, since excessive heat can degrade certain nutrients. Mix thoroughly to ensure even distribution before pouring into molds. Always measure supplements carefully and follow recommended dosage guidelines. While homemade vitamin gummies can be a convenient option, they should complement not replace balanced nutrition or professional medical advice.
Follow Us Youtube
gelatin gummy recipe
Ingredients
Equipment
Method
- Pour ½ cup juice into a bowl and sprinkle gelatin evenly on top. Let bloom for 5–10 minutes.
- Heat remaining 1½ cups juice in a saucepan over low-medium heat. Do not boil.
- Stir bloomed gelatin into warm juice until completely dissolved.
- Add honey or sugar and optional lemon juice. Stir gently.
- Pour mixture into silicone molds carefully.
- Refrigerate 1–2 hours until fully firm.
- Remove from molds and store in an airtight container in the refrigerator.